

Five things every vegan needs in the kitchen
Indispensable stuff you should probably have...

So I hate lists of stuff, and I wouldn’t encourage anyone to spend money unnecessarily, but I think it’s helpful to offer up my random thoughts on bits and bobs I’ve found useful over the years, helping you cook stuff and eat well.
Of course, everyone has that favourite knife, chopping board or plate, and the way you cook shouldn’t rely on gadgets and gizmos, but I do have a bit of a penchant for gadgets in the kitchen, even though we have one of the smallest kitchens in the universe.
And in an environment where space is at a premium, you have to ensure you’re using everything. Yes, we still have that chaotic drawer in the kitchen that everyone has, full of attachments for long-forgotten devices, cookie cutters, bits of this and that, string and rubber bands, but I’ve narrowed my stuff down to what I think is an effective minimum. Three saucepans and two frying pans. Two large bowls for mixing, a food processor and a coffee machine. We’ve also got a microwave and an air fryer, but the air fryer’s broken, sitting glaring at me from a corner of the kitchen, waiting to be mended or replaced. And the microwave is getting a bit scary - its insides are flaking off.
A pressing matter
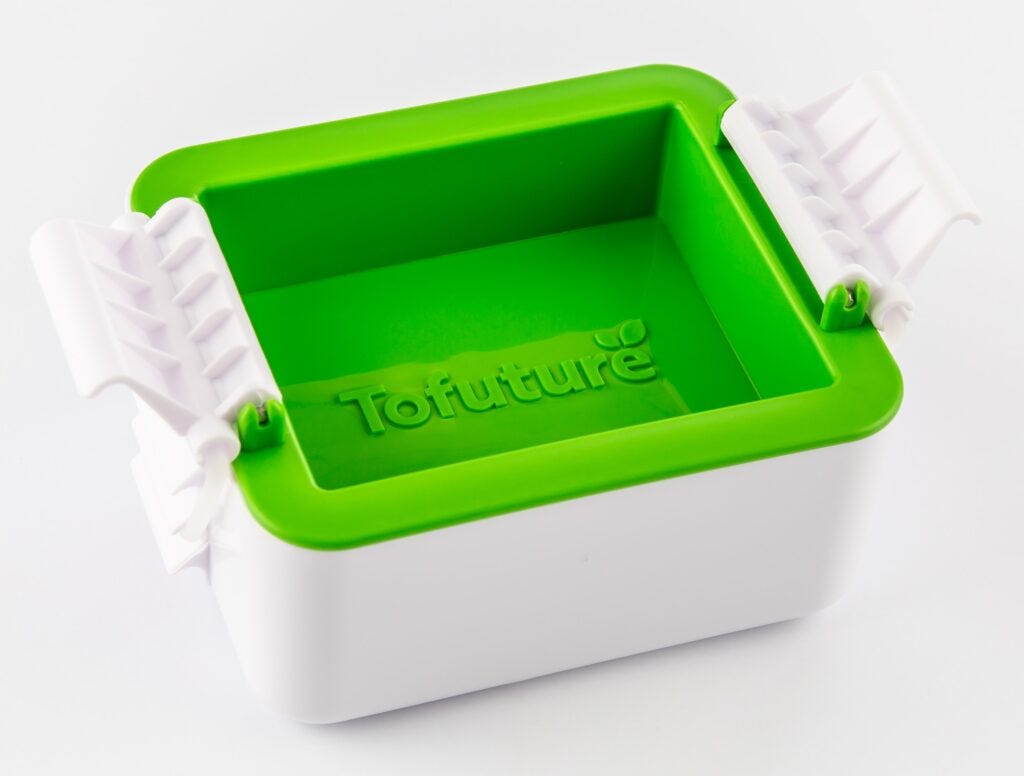
First up is a tofu press. That’s not the name of a vegan publishing company, rather a handy device that squishes the gloop out of tofu. My niece, Amy, intuitively bought it for me. We shared a flat at one point, and I think she remembers pots, pans, books and plants balanced precariously, like a scene from a cartoon, on top of a little bit of teatowel-wrapped tofu. And most people find such a chaotic, booby-trapped pile stressful to look at. So get yourself a tofu press to avoid disasters, especially if you suffer from nosey cats.
A tofu press is a little pot (and yes, sadly mine’s plastic), with a perforated straining tray that sits inside it. Then the whole thing gets clamped down with stretchy rubber cords that squish the living hell out of the tofu. These days, you can buy extra firm tofu brands like Tofoo that don’t really need much draining, but most other types and brands need a good squishing. And half an hour in the press does it.
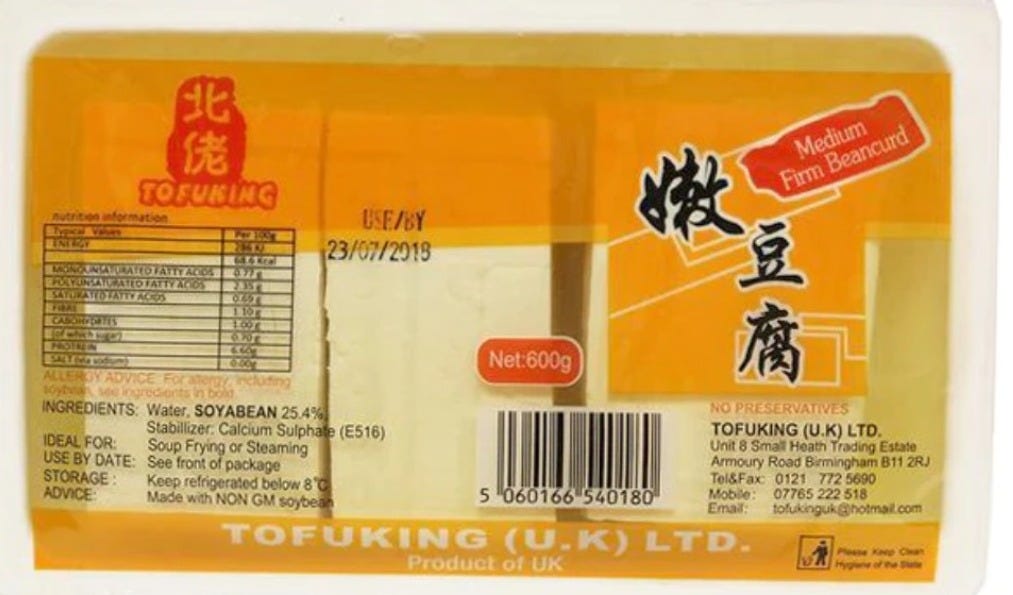
Mine is by a company called tofuture. (A good name, but not my favourite tofu brand name - which has to be Birmingham-based tofu wizards ‘Tofuking’; a name which always makes me guffaw, and makes me wonder how they were allowed to call it that.)
“But why press tofu?” I hear you exclaim. Well, it’s because it improves texture, making it firmer, allowing it to better hold its shape during cooking. This is particularly important for stir-frying, grilling or baking, where a denser texture is better.
Removing the tofu gloop also creates space for it to absorb marinades, sauces and seasonings more effectively, resulting in a richer flavour. Just remember that tofu is mystical, and leaving it marinating overnight rarely makes it taste better than leaving it marinating for half an hour or so, in my humble opinion.
The lovely @fitgreenmind lady - Maya - over on TikTok reckons she keeps jars of tofu in different marinades in her fridge, to grab it and cook with it as needed, but that seems like a huge commitment to eating tonnes of the stuff.

 Tiktok failed to load.
Enable 3rd party cookies or use another browser
Pressed tofu also cooks more evenly and crisps up better. Excess water can cause tofu to steam rather than brown, so pressing helps achieve a desirable texture and colour.
There’s even an environmental/ money-saving angle - less water in the tofu means it cooks faster, saving time and energy in the kitchen.
Bonus: Don't bin your tofu water
Tofu water can be used as a base for soups, stews, or sauces. It has a mild flavour, so it won't overpower other ingredients, but it can add a subtle umami taste.
Add tofu water to smoothies or juices for a slight protein boost. It's generally low in calories and may contribute a bit of creaminess.
Tofu water is rich in nutrients that can benefit plants, especially indoor ones. Just be sure it's unsalted and free of any additives before using it as a mild fertilizer.
You can also use tofu water in place of plain water in some baking recipes, like bread or pancakes, to add extra moisture and a slight protein content.
Some people even use tofu water as a mild toner or face mist, believing its nutrients can be good for the skin. Do a patch test first to check for any sensitivities.
Time to blend in
A basic blender is a must. Even better, a food processor. A stick blender is a good cheap investment that you won’t regret. I got my current food processor as a gift from my awesome partner, and over the years I’ve replaced the main bowl, cracked the nut/ spice blending bit in a fit of rage when it wouldn’t come off, and the tall liquid blending jug is cracked from pouring boiling liquids into it, because I’m an idiot who expected a kitchen device to be heat proof. I’m being ironic. It’s the Trigger’s broom of food processors, really.
It saves time, mixes stuff up better, and if, like me, you dream of creating the ultimate hummous or vegan cheese, you need a powerful blender to get a smoooooth consistency.
There’s a lot of choice out there, but the most important thing is the speed at which it blends - or rather, the power of the motor. The higher, the better. And it seems the more power, the higher the cost, unfortunately.
And learn how to use it. Mine came with instructions in French, and some weird visual clues as to what settings to use for what purpose, but over the years I’ve wrangled it, shouted at it, and beaten it into submission. I’m still not sure what the two shredding blades do, and if I’m trying to make coleslaw or something, the choice of cutter is a gamble - it could create shreds or chunks, you don’t know until it’s spinning round and attacking a carrot.
Get one that’s easy to disassemble and clean. Top tip is a bit of hot water and a drip of dishwashing liquid in it, and then blend for a few seconds. Saves a splashy faff in the sink. And if your processor bowls start looking scratched (as they will), rub a bit of vegetable oil in there, it cheers it up to think you’re giving it a loving massage.
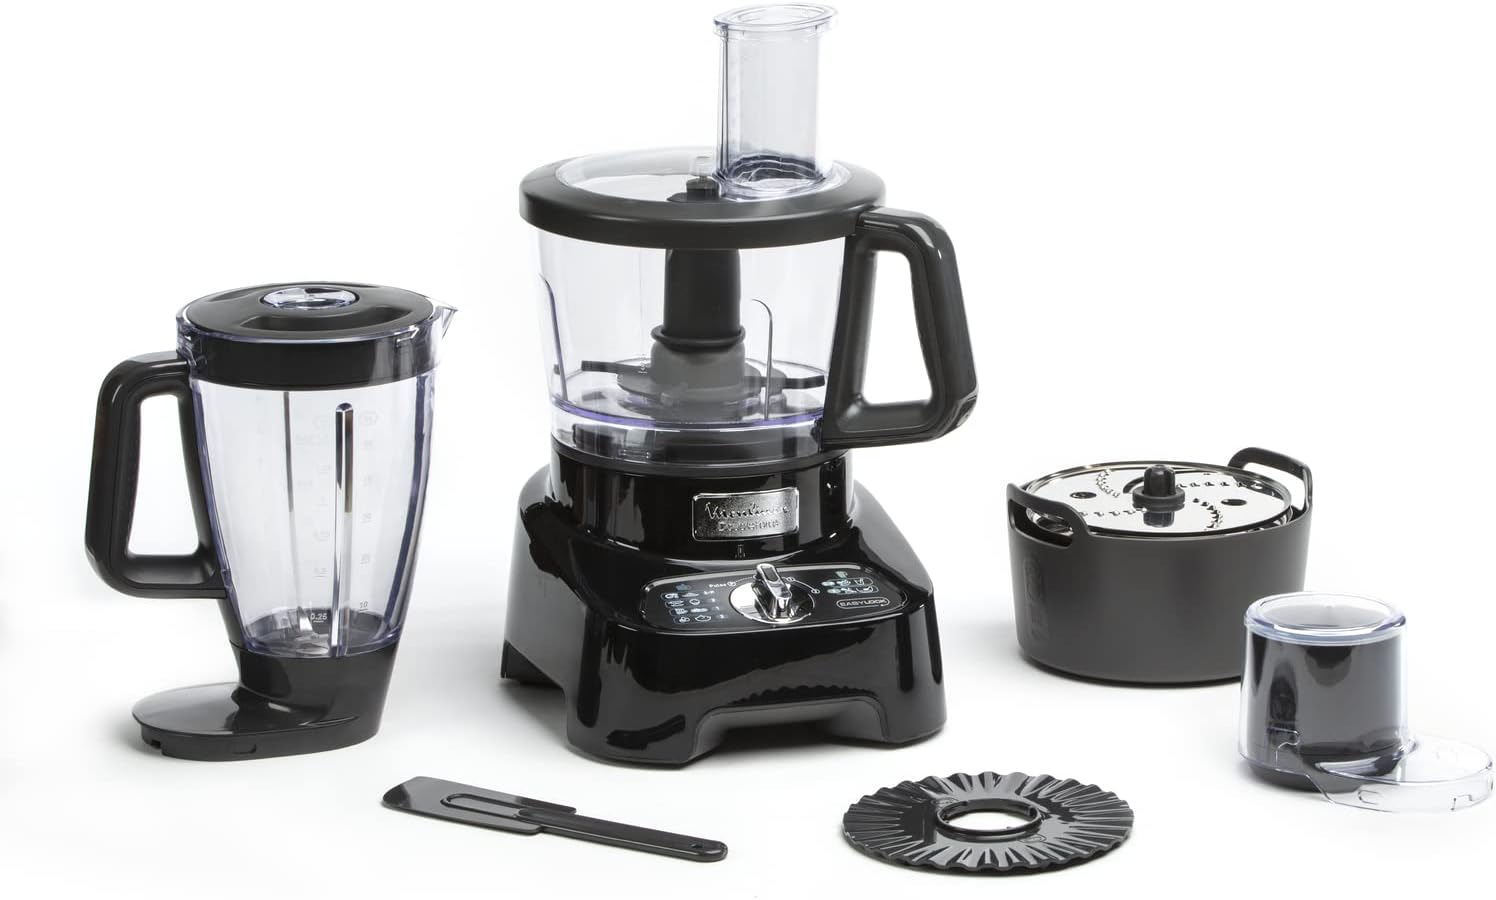
A shinier, newer looking version of my food processor, with all the bits intact. That spatula faced the wrath of the blades and got shredded. I’m still not sure what the round plastic piece at the front is for, dough I think, and the French railwayman chapeau—looking thing has a chunk missing. The jug is so cracked it’s amazing it stays together. And the bit that allows you to push stuff down into the main bowl when you’re shredding or cutting got lost, so now it’s all fun and games trying to push things into the feeder tube without getting silly string-style fingers.
Not a silly con
A lot of chefs - at least the variety of people I watch on YouTube - wholeheartedly recommend a silicone spatula. This, to me, is an indispensable kitchen gadget. Get a bendy one. They’re pretty cheap, luckily, and if you’re like me (read about the blender, above), you’ll get through them as they seem quite easy to nick, cut and end up with an edge as wobbly as a drunk walking home.
I think it’s a Persian saying (correct me if I’m wrong), but I heard a cook say ‘The secret’s in the bottom’ - meaning when you make a dish, all the good stuff - the flavour, the crispy bits, and the thickest sauce - remains in the bottom of the pan. So you don’t want to go scratching around with a metal spoon or fork (potentially ruining your pan) you need a gentle silicone spatula to gouge out the goodness. A good cook - myself included - doesn’t leave food behind in the pan, and again, a malleable spatula allows you to easily get all the last bits out, and helps when it comes to doing the dishes, too.
They’re heat proof too, so, if you’re like me, and you tend to absent-mindedly leave your utensils resting on the side of the pan, they won’t melt into it. Bonus.
Last time I looked you can get one for £1 in IKEA. BUT - try to look after your trusty spatch better than I do. Silicone is considered more sustainable than many types of single-use plastics due to its durability, reusability and non-toxic nature. However, its sustainability benefits are maximised when it is used long-term, reused extensively, and properly recycled at the end of its life. In contrast, its production and non-biodegradability do present challenges that we should be aware of. Recycling silicone is a bit of a challenge - I did some research, and it can be recyled, but only at specialist facilities.
Jar Jar Jinks
Storage is an issue in our kitchen, always. We’re lucky to have Charlie the electric milk float buzzing past our flat every now and then, filled with bulk foods. And it was Charlie the float, during the tail end of lockdown, that really cemented my relationship with hoarding jars. You rock up to the van with your jars, and get them filled with a cornucopia of good stuff from the back of the milk float - like oats, rice, nuts, seeds and stuff. No jars, no stuff, you see.
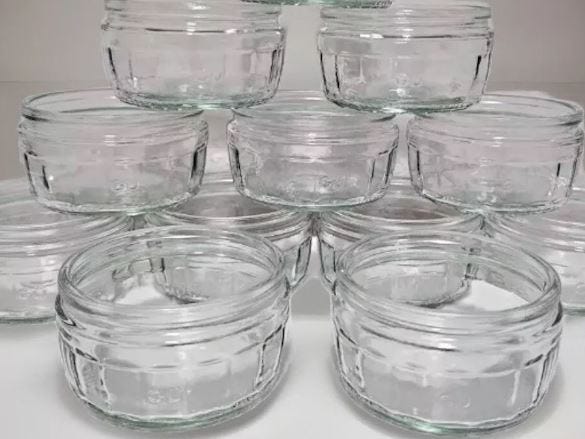
This image is from some cheeky sort who’s trying to sell their empty dessert pots on eBay.
Like every 50-something bloke, I have a collection of those GU pots, I’m not even sure how we acquired them - but I also keep every glass jar that comes into the house. Well, most of them. Everything from old spice jars to peanut butter, jam and yes, there’s a succulent happily thriving in an old Marmite pot.
While I did succumb to buying some of those lovely Weck lockable jars, there isn’t room in the kitchen to have loads of them, and smaller jars mean buying less, which keeps stuff fresh.
Keeping old jars means less waste, and re-using stuff makes me happy.
As someone who cooks a lot, I find jars are great for storing leftovers, soup, crackers, beans, pulses, grains, nuts, etc, etc, etc. While we also keep and re-use takeaway containers, I feel better using glass jars. Just make sure you’ve washed them out well and dried them, as they do carry the residue of whatever was in them, and can get stinky if you leave them not very clean with the lid on. A quick way to sterilise a jar, by the way, is to simply microwave it, half filled with water, untill the water boils. Then leave them upside down on your dishwashing rack to dry.
A label fable
So you have all these jars in your cupboard, right, and because you’re clever, and always cooking, you know that you’ll remember what’s in each jar, right? Until you don’t. Again, dear reader, I’m sharing my harsh kitchen lessons. As heartbreaking as the time I paid £20 for a bag of parsley at a music festival, opening the cupboard to an array of unlabelled jars is a heartbreak, not to mention a pain in the ass, and potentially a pain in the stomach, too.
I’ve mistaken nooch for vwg, plain flour for potato starch and I’m still not sure if it’s millet, quinoa or aramanth in one jar. It’s a dinner time lottery, I tell you.
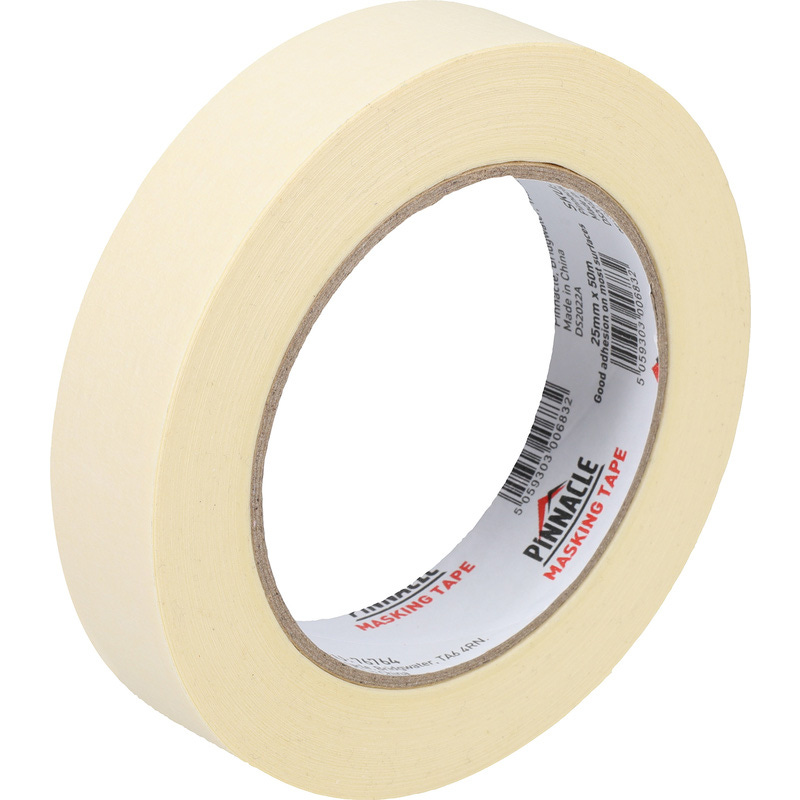
You can’t mask the truth with a good label….
So don’t be a fool, friend, get labelling. I don’t mean you need to rush out and buy one of those label printers, or a special kit or anything. My awesome partner alerted me to a wonderful hack - masking tape. You can find cheap rolls in any pound/dollar/groat store, and so you can just tear a bit off, write on it, and proudly stick it to your jar.
It’s easily removable, too, which is important, and also works well on stuff in the freezer, where I’m also apparently all-too-fond of a good game of mystery box defrost lottery.
My beautiful friend Ruba in Dubai has a beautiful family, a beautiful kitchen, and of course, a beautifully-organised storage space, with labelled pots and jars as far as the eye can see. Her kitchen storage cupboard is literally as big as our kitchen. Sigh.

So that’s it. Grab yourself a tofu press, a blender, a silicone spatula, jars and labels and cook your lovely vegan heart out!
RECIPES
This week, I have to share a couple of cracking recipes which the universe sent my way. While trying to work out what the hell was in my cupboard jars, I came across a bag of besan - chickpea flour - and it had a recipe on the side for onion bhajia, pakora, or what we call bhaji in Britain. Finding the recipe also happened to collide with a mysteriously massive amount of onions in the house. And a hankering on my part for a tasty fried treat, which happens to the best of us, right?

Onion bhaji/ bhajia/ pakora
This recipe took me straight back to the streets of Karama in Dubai, where those in the know head for proper, tasty, cheap and authentic Indian food. I used to live there, and on those extremely rare days when it rained or felt a little cooler, we used to love heading to one of the roadside cafes - chai stall, tapri, dabha, call it what you will - for pakora and chai, maybe a jalebi or other sweet treat.
There’s a rich culture of fantastic Indian snacks in Dubai, and we still seek them out in London - Drummond Lane near Euston, Southall and Whitechapel are all great, but when you see the prices, it can make your eyes tear up more than chopping an onion while watching the end of Marley & Me on repeat.
Ingredients
2 level cups of besan/ chickpea flour
1 tsp cumin seeds
1 tsp coriander seeds, crushed
1 tsp salt
1/2 tsp chilli powder
1 tsp garam masala (I added this to the recipe, as I didn’t have coriander seeds, and wanted to spice things up a bit)
1/4 tsp of bicarbonate of soda
1/4 pint/ 142ml of water, or thereabouts
Two medium onions, finely chopped
Oil of choice for frying (honestly, don’t muck about baking or air frying, frying is the best way)

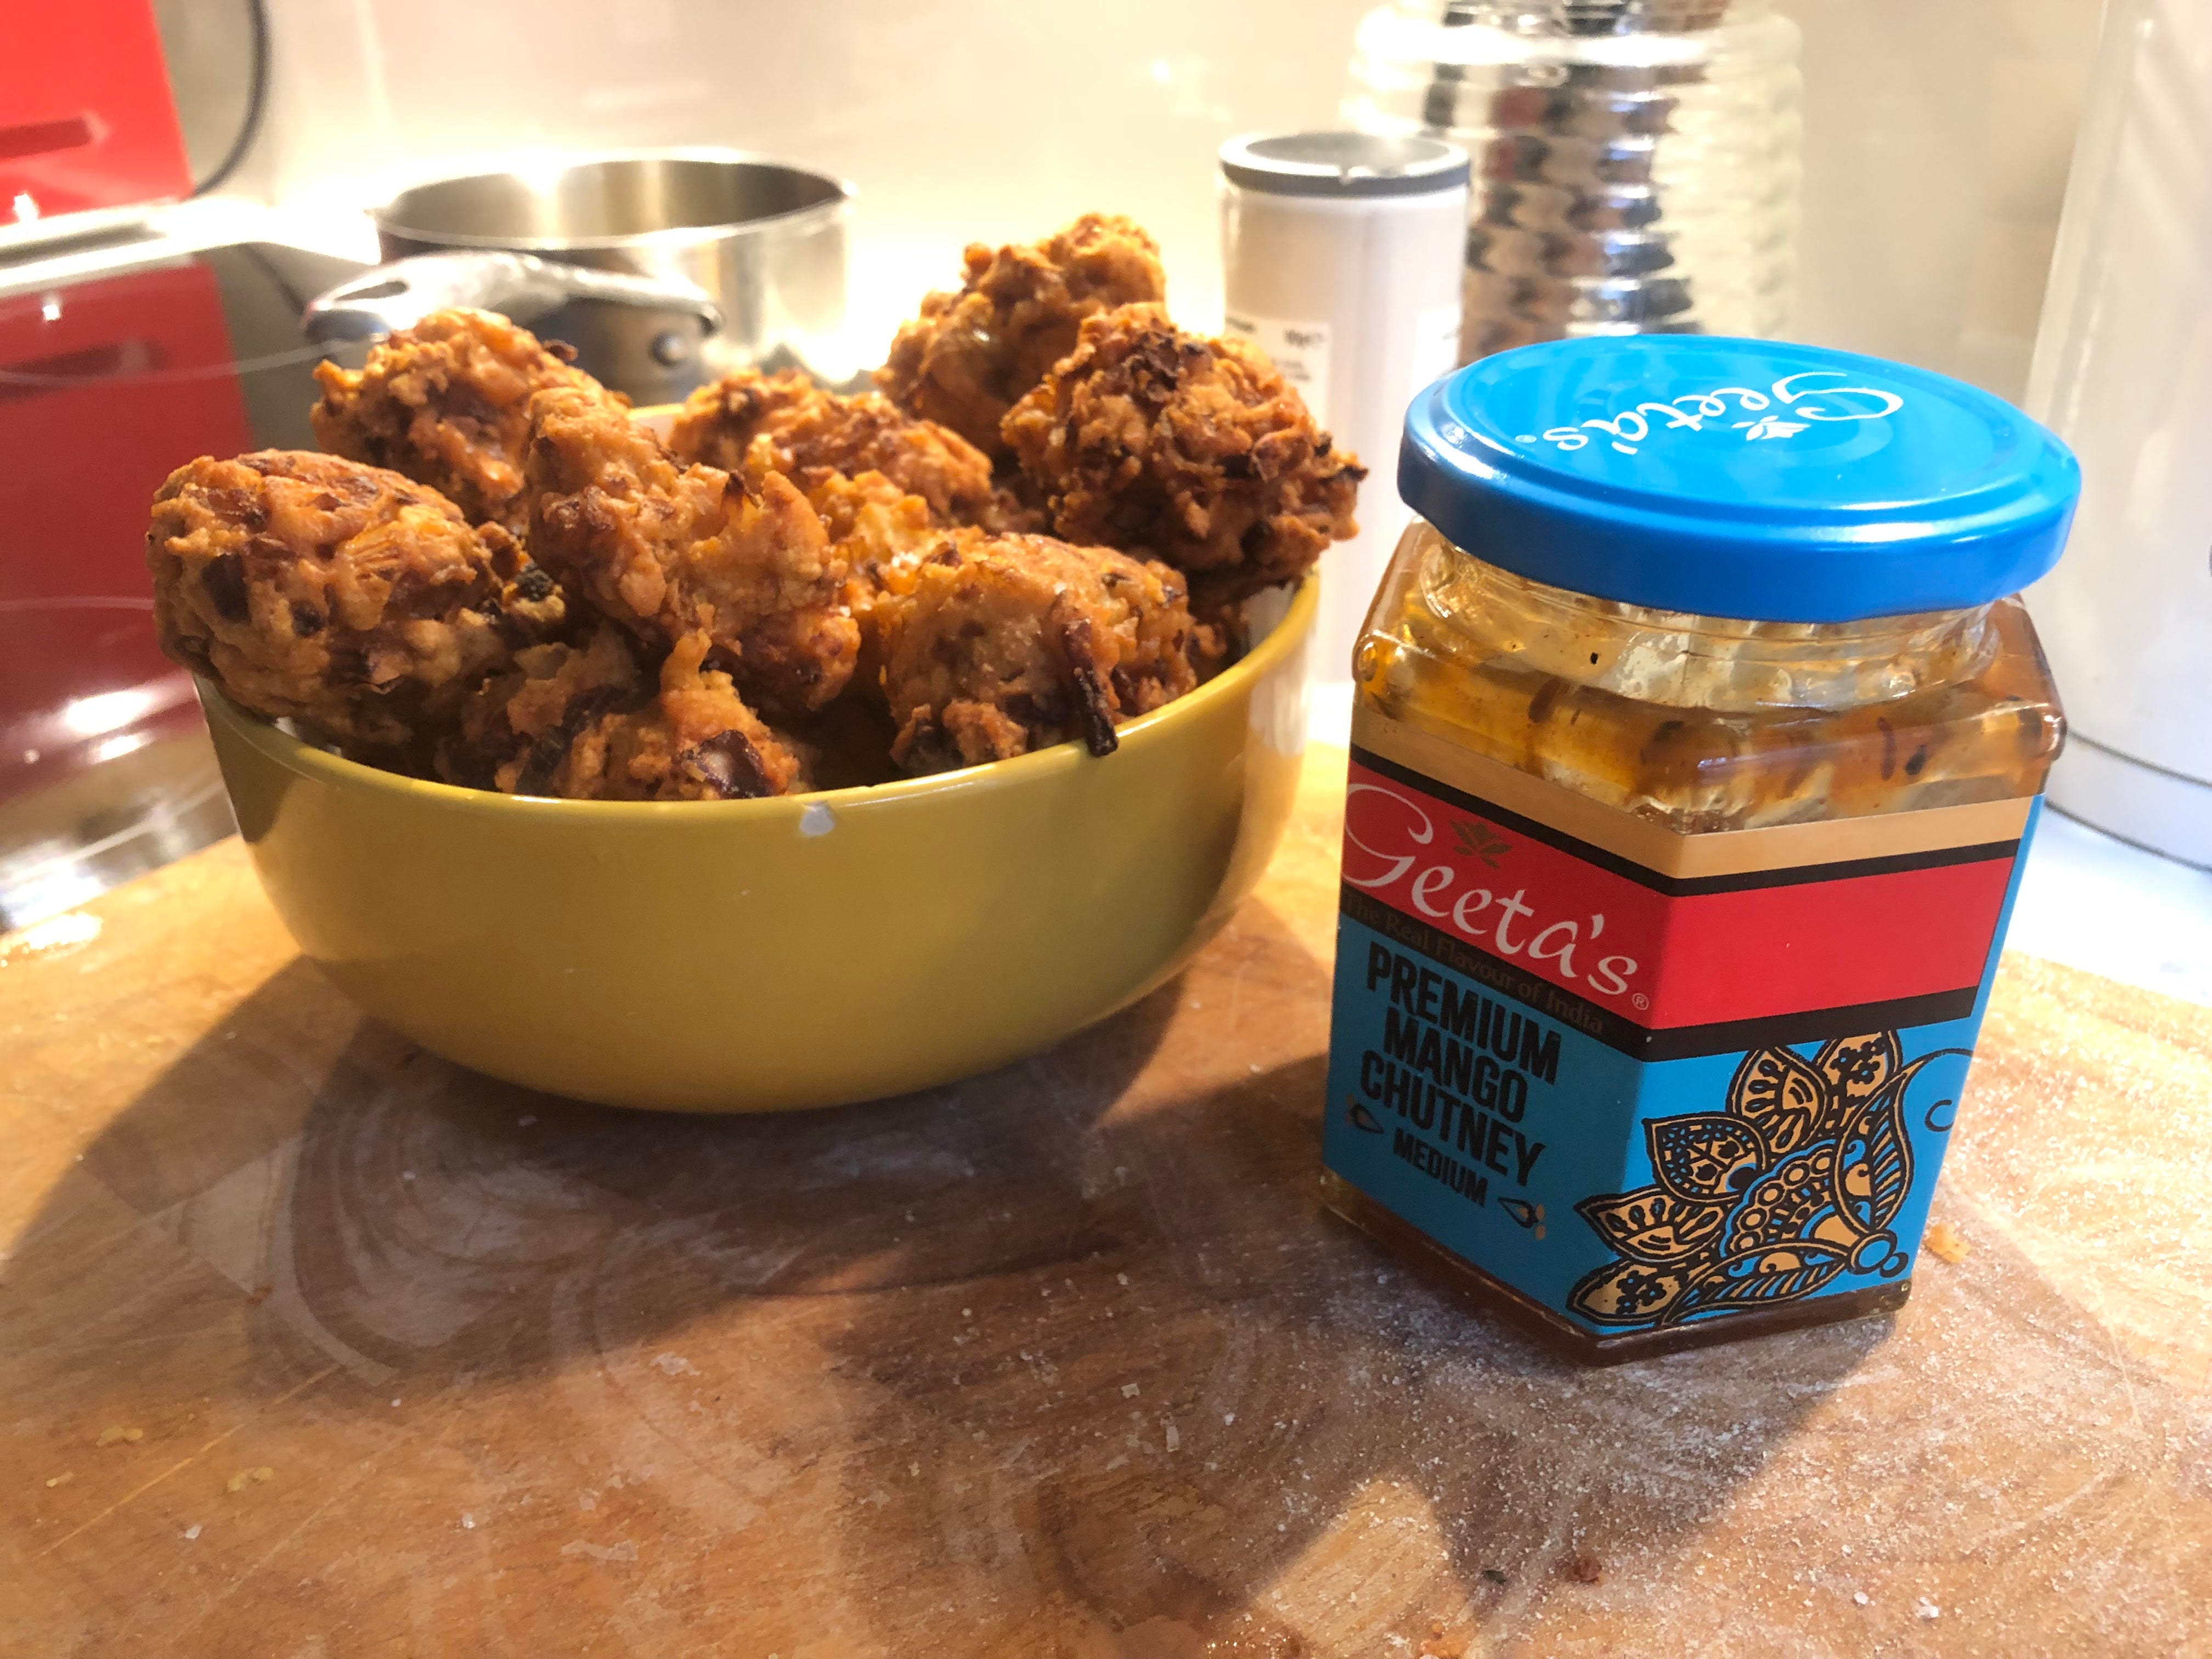
My proud pakora, beautiful bhajia….please ignore the chip on the bowl - another reason why I don’t do as much food photography as I used to….
Preparation
Mix all the dry stuff together in a big bowl. I sieved the flour, as it seemed a bit lumpy. You could mix in it your processor if you like.
Add the water, a dribble at a time, until the mix coaguletes into a really thick, pasty batter. You really don’t need to over mix it, and ensure it’s not too wet.
Leave it for five to ten minutes, while you dig out a sauce pan and heat some oil on medium high.
Grab four or five blobs of the batter mix and drop them gently into the hot oil. I swirl it about, gently, as I worry the bhajia might stick. Cook them for about three minutes - I used fairly shallow oil, so they warranted flipping after 1.5 minutes - using a knife and fork - until they’re golden brown.
Drain the oil off (I put them in a bowl lined with a tea towel) Salt them a little, and serve hot with a good mango or lime pickle - we love Geeta’s mango pickle.
Try not to eat them all at once. This recipe makes LOADS.
The next day, I made bhajia burgers with a couple of the bhajia, mango chutney mayo, fresh salad leaves and battered and baked slices of potato all in a good bun. It went too quick to get a photo, sadly.
Insanely high protein Vanilla Ice Cream
This mad recipe is made with chickpeas, but it tastes so goooood! And next time a meat eater enquires as to where you get your protein from, throw a spoonful of this in their face!
I’ll just leave the insta post here.

Ingredients
1 can chickpeas (or 1 ½ cups cooked chickpeas) (250 g)
10 soft dates, pitted + soft
½ cup (150 g) almond butter
½ cup (120 ml) plant-based milk
1 vanilla bean
Preparation
Drain the chick peas, make sure your dates are pitted, and blend everything until it’s as smooth as a dove’s eye.
Freeze it until it gets all ice creamy, and then eat it. try not to eat it all at once.
The awesome partner’s powerful pan play
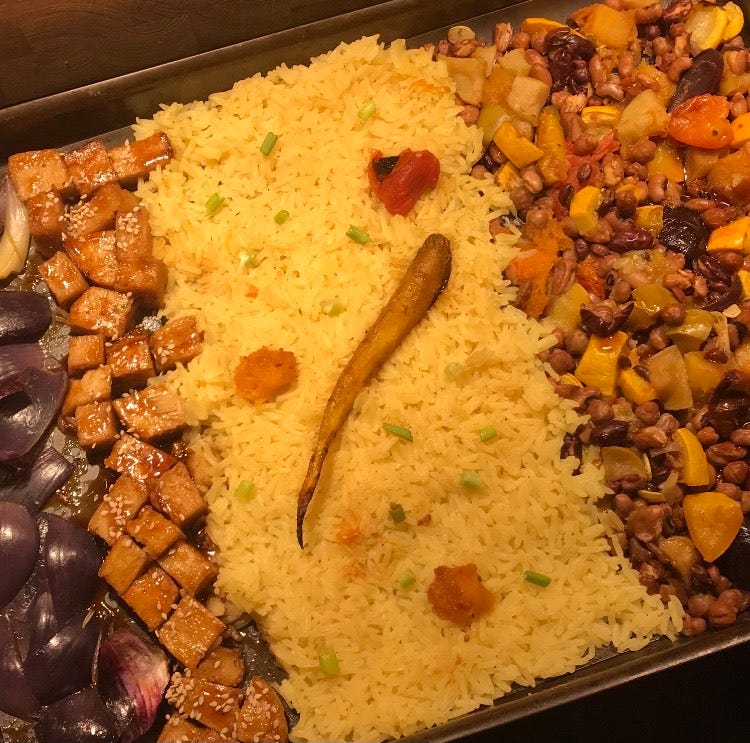
Two Pan Teriyaki Tray
This recipe was made by my awesome partner a few nights ago, and it was so tasty I felt it deserved to be shared. It came from a Gousto meal company recipe originally, but as my unwilling protege, she’s learnt the gentle art of mucking about with recipes dependent on feelings, mood and what’s in the cupboard.
Ingredients
1 cup of rice
1 teaspoon of Slap Ya Mama spice mix (or your preferred spice mix - like all purpose seasoninng or bbq seasoning)
1 tsp turmeric
1 can mixed beans
1 cup of sweet potato, cubed
3-4 cherry tomatoes
1 courgette, chopped
1 red onion, chopped into moons
1 carrot, peeled
200 gms chopped fake chicken, tofu, seitan
1 Tbsp soy sauce
1.5 tsps cornflour
25g agave/ maple syrup
A sprinkle of sesame seeds
Preparation
Heat the oven to 200c
Cook the rice and turmeric in 1.5 times the water, bring to the boil. Once boiling, turn the pan to very low, with a lid on, for around 12 mins, or until all the water’s absorbed.
Put your chopped onion, sweet potato, courgette, tomatoes, carrot and drained mixed beans on a baking tray, spray with some oil and a sprinkling of maple syrup and salt if you like, and bake for 20 mins, initially.
Add the cornflour to a small bowl with 50ml of water and mix it well with a fork, until it’s smooth.
Heat a small pan to low-medium, then add the cornflour mix, the agave and the soy sauce, and heat until it thickens - in a few minutes. This is the teriyaki sauce. Set aside in a bowl for later.
After 20 minutes, take the veg out of the oven, and give them a stir. Push them to one side and add your chopped fake chicken. Cook for another 20-40 mins, depending on what kind of meat replacement you’ve got going on.
When it’s all cooked, serve it all up with the basmati rice sprinkled with your seasoning of choice, the cherry tomatoes and carrot.
Pour the teriyaki sauce from the bowl over the chicken pieces, and if there’s any left, over the veg, too. Sprinkle the pieces with sesame seeds.
Dear reader,
If you’ve made it this far, thanks, hope you’ve enjoyed the ride. At this juncture, I normally share some news I’ve found interesting, and a cause worth supporting. But it’s late, and I’m tired, and I have to go and label some jars.
Love and gadgets,
I'm so glad I'm not the only jar hoarder! I know most vegans have a tofu press but I can't be bothered...granted, today I did chop off a slice of tofu and ate it raw so I'm not one to be picky about the moisture content or texture, I love it all!
This may have been an unintended tip but I'm definitely going to plant a succulent in a marmite jar too!
I love these quick hacks, especially reserving the tofu liquid for soups, stews, sauces etc. and using simple masking tape for labeling! It's obvious now, but I would have never thought of it 🙏
The avocado hack for ripening is also great, my trick was always to leave them overnight in a paper bag with some bananas, but this is wayyyy quicker and in the past it would have saved me from many irate customers, demanding their avocado toast 🙃, thanks for sharing!