

One jar to save us all...
A quick dip in the briney world of fermentation, and simple recipes

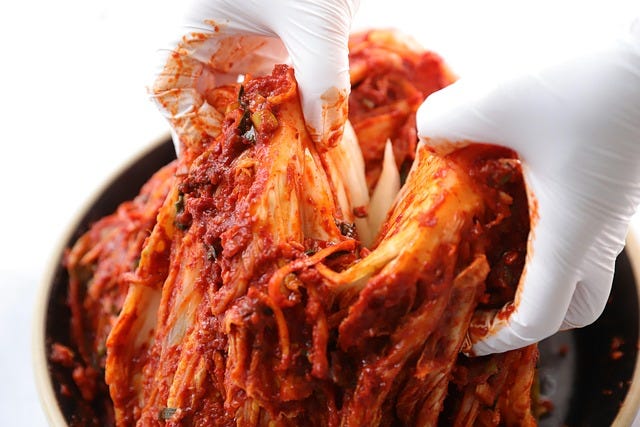
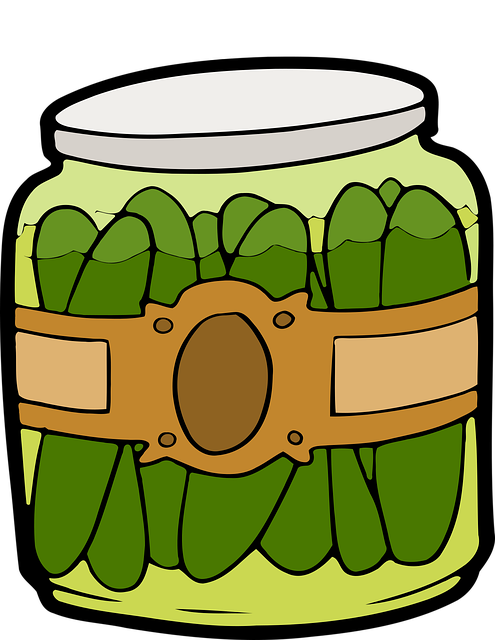
Image via Ipegasu, pixabay
A few weeks ago I wrote a post all about pickles and pickling, and promised to rapidly follow up with another post about ferments. But then, life got in the way, in the form of gastroenteritis, which ripped out my insides, and replaced me with a new, fully detoxed version of myself, for which I’m weirdly grateful.
Honestly, after losing my own body weight in unwanted fluids, then ending up on a double drip of antibiotics and saline, I felt brand new! But unable, dear reader, to write or think about things like gloopy ferments for a little while.
Anyway, my pickle posting, I hope, went some way to dispel some common myths about the complexities of pickling. This week, I’m going to attempt to do the same for fermentation.
Ferments (lacto-fermented veg), for the purposes of this newsletter, are vegetables preserved using salt + time, rather than vinegar (acid) we use to pickle stuff.
The fermentation process is simple enough. Covering veggies in salt draws out water, then natural bacteria convert sugars into lactic acid. In simple terms, the salty water generated by putting salt on vegetables creates a safe environment where good bacteria (that are already on the vegetables) can grow.
These good bacteria (called lactobacillus) eat up the natural sugars in the vegetables.
And as they eat the sugar, they turn it into lactic acid. That lactic acid makes the vegetables sour (like sauerkraut or kimchi), stops harmful bacteria from growing and preserves them so they don’t rot.
What a beautiful, natural process right? However we couch the process, it’s basically controlled rotting.
This process can happen in as little as three days, over several weeks, or if you’re a fermentation fanatic, years…and the ferment flavour deepens over time.
A good ferment will taste complex, savoury and slightly funky….and for many, it’s an acquired taste. I’ve always wanted to like natto, for instance, but it’s just too weird for me.
And a good ferment is less sharp than a pickle.
Why feast on Ferments?
Fermented foods contain beneficial microbes (or compounds made by them). They help create a healthy gut microbiome, which
Improves digestion
Reduces bloating
Supports immune function
Plant-based diets are already high in fibre, which feeds gut bacteria, but fermented foods can help introduce or support beneficial strains. If you think of fibre as fertiliser, ferments are like adding extra seeds.
You might be put off making your own ferments because of the perceived effort level involved, right?
Well, in my experience, there’s a little bit of effort and attention needed at the start of the process, but then they can be largely left alone until you fancy tasting them. It’s a simple, slow process, really.
And it’s safe, as long as you know the signs to look for (see the golden rules, below).
People can be scared of ferments because they think they’re risky. In reality, salt + veg + time = one of humanity’s oldest safety systems.
You are far more likely to under-season soup than poison yourself with sauerkraut
Ferments tick the box for me because they’re cheap, tasty and time does most of the actual work here.
Choose ferments if you like deeper, savoury flavours, you want to incorporate more probiotic foods into your diet and you enjoy slow food processes - and are happy to wait.
Here are three ultra-safe, beginner-proof ferments. These are the ones I find quite hard to mess up – and they’re pretty forgiving!
Want more info? I defer to this lovely article and video.
The Recipes
This guy is in quite a ferment fever…
Basic sauerkraut
This simple ferment is ready in about a week, and it’s ultra safe (for beginners, like me), because cabbage ferments fast, releases its own liquid, and acidifies quickly. And, like me, if you’re impatient, you can actually try some after about three days.
Ingredients
1 medium white or green cabbage (go wild and get the best one you can find, ideally organic)
1½ tsp fine salt (about 2% by weight if you want to be exact)
Preparation
Shred the cabbage finely.
Sprinkle with salt.
Massage hard/well for 2–3 minutes until liquid releases.
Pack tightly into a big, clean glass jar or two. The cabbage must sit below its own juice. If you end up with more cabbage than jar, you can always make a quick coleslaw (onion, carrot, yogurt or sesame oil), or pickle it.
Loosely cap the jar, or cover it with cloth. (A rubber band helps keep the cloth in place)
Leave the jar at room temperature (18–22°C is ideal).
Checkpoints
Day 1–2: bubbles appear = good
Smell: fresh, sour, slightly cabbagey (not rotten)
If surface yeast (scum) forms: skim it off — this is totally normal
Refrigerate the jar once it tastes pleasantly sour.
Fermented carrots (sticks or coins)
Another solid and easy ferment, carrots are good to work with because they are sturdy, predictable, and don’t go mushy easily. These are ready in less than a week, too, around four to six days.
Ingredients:
3–4 carrots, sliced
1 tsp salt
1 cup water
Optional: Throw in a garlic clove, ginger slice, or a few peppercorns — or all three.
Preparation:
Dissolve the salt in water, to make a brine.
Pack carrots into jar with any flavourings.
Pour brine over until fully submerged.
Weigh down if needed (a small jar or clean stone works).
Cover loosely, and ferment at room temperature.
Checkpoints:
Brine turns cloudy = good
Carrots stay crunchy
Sourness builds gently, never harsh
Fridge your carrots when you think they’re tangy enough.
Fermented cucumbers
This fast, small batch recipe is great because there are obvious signs that things are going right/ wrong, making it easy to stop the process early. Like the others, they’re ready in three to five days.
Ingredients:
3–4 small very fresh cucumbers (very fresh)
1 tsp salt
1 cup water
Optional but tasty: garlic, dill, peppercorns
Preparation:
Dissolve the salt in water to make a brine
Pack the cucumbers tightly into jar with any flavourings you fancy, as above.
Pour the brine into the jar, to fully cover the cukes.
Keep them submerged at all times, put a lid or cloth on the jar.
Ferment at room temperature.
Checkpoints:
Bubbles by day 2 = perfect
Taste daily from day 3
Stop early for crunchier pickles
Refrigerate your jar before they soften.
Four golden safety rules
Memorise these and you won’t go wrong…
Always salt first.
Your veg must stay submerged.
Fresh veg are safe. Limp/ old veg will give you trouble.
Trust your nose. Sour is good. Rotten is not.
And…
If it smells clean and tangy, it’s safe.
If it smells like bin juice, compost it.
The zero-fear ferment manifesto
Fermenting vegetables is not a niche hobby, a biohack, or a test of personal bravery. It’s one of the oldest, safest food practices humans have ever relied on. Your ancestors did not have thermometers, sterilised jars or Reddit threads.
They had vegetables, salt and common sense - and they survived.
1. Fermentation is preservation, not decay
Fermentation is controlled change, not rot. Salt creates an environment where helpful bacteria thrive and harmful ones cannot.
Sour is safety. Funk is flavour. Rot smells bad for a reason. If it smells clean and tangy, it’s doing exactly what it should.
2. Nature already knows how to do this
You are not “adding bacteria”. They are already there - on the vegetables, on your hands, in the air.
The job is simply to:
Add salt
Keep things submerged
Get out of the way, and
Trust the process.
3. Perfection is not required
Your jar does not need to be Instagram-ready. Cloudy brine is normal. White surface yeast is common. Bubbles are good.
Ferments are alive. They’re allowed to look alive.
4. Vinegar is optional. Salt is not
Quick pickles rely on acid. Ferments rely on salt.
Salt is the gatekeeper, and sets the rules.
Never forget the salt.
5. Your nose is better than the internet
If it smells fresh, sour, slightly cabbagey / garlicky / pickley: It’s all good.
If it smells rotten, putrid, like bin juice or your dog’s breath, you don’t need advice, you need the compost.
6. Fear is the biggest barrier, not bacteria
Most people don’t fail at fermenting. They stop before they start because they think it’s dangerous. It isn’t.
Don’t forget that fermentation fed humans through winters, migrations, wars and crop failures. It is safer than most modern ready meals.
7. Start small. Taste often. Stop early
You don’t need a six-month crock project. You just need a clean jar, salt, a carrot, and three days. Taste daily. When you like it, refrigerate. Done. Control comes from attention, not equipment.
8. There are no ferment police
No one is grading you, or checking your ratios. If it tastes good and smells right, you have succeeded. Go you!
9. Confidence comes from doing, not reading
The first ferment removes the fear. The second builds trust. By the third, you stop asking permission and worrying. At that point, you don’t “ferment”, you just keep vegetables properly.
A week of meals built around one jar
Assume you’ve made one jar of sauerkraut or fermented carrots. These super quick meals don’t require extra prep or batch cooking. Just additions.
Day 1 — Toast, upgraded
Meal: Avocado toast + spoon of ferment
• Toast
• Avocado
• Olive oil, salt
• Ferment on top
Why it works: fat + acid + crunch = instant balance
Feels like: breakfast with purpose, not effort
Day 2 — Soup with a brain
Meal: Simple lentil or veg soup
• Whatever soup you already make
• Add ferment at the table, not during cooking
Why it works: heat + sour wakes everything up
Rule: never cook the ferment — stir it in at the end
Day 3 — Rice bowl night
Meal: Rice + roasted veg + tofu/beans
• Leftover rice
• Roasted whatever
• Tahini or soy
• Big spoon of ferment
Why it works: ferment replaces sauce, pickle and seasoning
Shortcut: fewer ingredients, more flavour
Day 4 — Sandwich and sourness
Meal: Grilled veg or hummus sandwich
• Bread
• Hummus / mashed beans
• Roasted veg
• Ferment instead of chutney
Why it works: acidity cuts richness
Upgrade: add mustard.
Day 5 — Noodles with pizazz
Meal: Quick noodles or pasta
• Noodles
• Sesame oil or olive oil
• Greens
• Ferment stirred through
Why it works: salt + sour = instant depth
Feels like: you tried harder than you did.
Day 6 — Lazy plate dinner
Meal: “Bits on a plate”
• Bread or crackers
• Beans, tofu, or leftovers
• Olive oil
• Ferment as the sharp element
Why it works: ferments turn random food into a meal
Day 7 — Reset bowl
Meal: Big salad or warm veg bowl
• Greens or steamed veg
• Seeds
• Olive oil
• Ferment as the hero topping
Why it works: digestive reset without drama
Mood: calm, fed, sorted…
That single jar:
• Replaces sauces
• Reduces seasoning decisions
• Improves digestion
• Makes simple food feel complete
No particular meal plan, just one jar doing background work all week.
That’s all folks! As always, let me know howe you get on.
Fervent fermenting and playful pickling,
Will x
Very interesting.